E3 - Equipment Energy Efficiency
Help Section - Applicant Management
Last updated 10 October 2018
Manage Your Applicant's Test Labs
The following page will show you how to manage your Applicant’s test laboratories (test labs) in the registration system.
This includes how to add, edit or delete a test lab.
Each Applicant has a list of test laboratories. This list is managed at the Applicant level. You can use the same test lab in a number of different product registrations.
There are two types of test lab:
- Your Own Lab: this is the Applicant's or organisation's own private lab; and
- Independent Labs: this is a public lab offering public testing services. When adding an Independent Lab you can choose from a global list of labs that are available to all suppliers.
You need to have at least one test lab for your Applicant to register
a product.
Watch our video walkthrough to see how to manage your test labs:
Alternatively, you can follow the detailed instructions outlined below:
Add a test lab
To add a test lab to your Applicant:
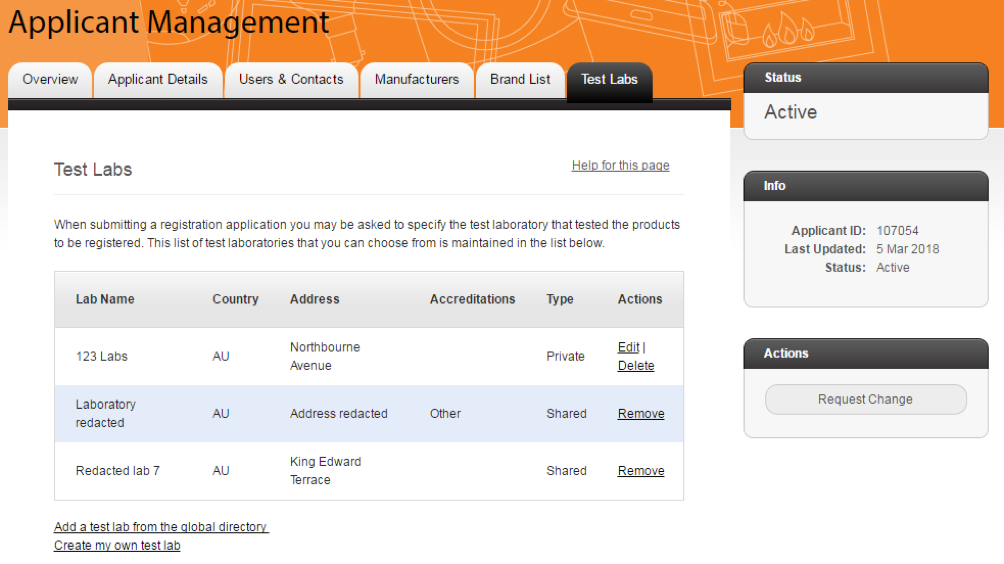
- From the top menu, select the “Test Lab” tab. The Test Labs page displays as shown in Figure 1 below.
Figure 1: Test Labs page

- Add a test lab using one of the following options: To add a test lab from the global directory
- Select the “Add a test lab from the global directory” link.
- Search for the lab details, and then select the “select” link next to your chosen lab.
- Details of the lab will appear on a new page. You need to check this is the correct lab, then select the “Add lab” button to confirm.
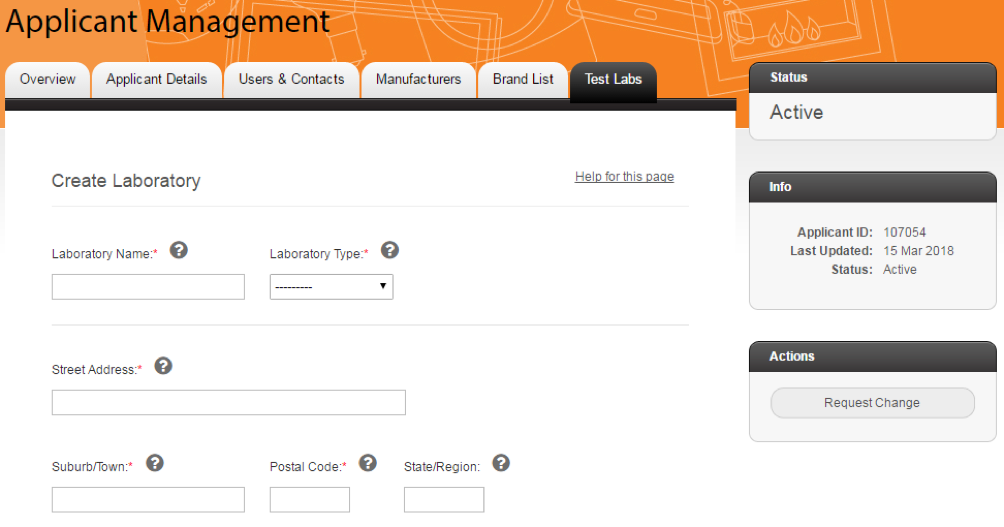
- Select the “Create my own test lab” link. The “Create Laboratory” page will appear – see Figure 2 below:
- In the “Laboratory Name” field, enter the laboratory name.
- From the “Laboratory Type” drop-down menu, select the laboratory type: Independent Lab or Own Lab.
- In the “Street Address” field, enter the street number and name.
- In the “Suburb / Town” field, enter the suburb within a city or town, whichever is applicable.
- In the “Postal Code” field, enter the postal code.
- In the “State / Region” field, enter the state, county or region, whichever is applicable.
- From the “Country” drop-down list, select the country.
- Select the “checkbox” if postal address is the same as street address.
- If the postal address is different complete the “address” fields.
- If you want this laboratory to be available to all users of the Registration System, select the “checkbox”.
- Select the “Save” button. The lab is added to your Applicant.
Figure 2: Create Laboratory page
Edit a test lab
To edit a test lab’s details:
- On the “Test Labs” page, select “Edit” next to the test lab you wish to edit (note: you can only edit your own test labs). See Figure 3 below.
Figure 3: Test Labs page
- The “Create Laboratory” page appears. Edit the details you wish to change. See Figure 4 below.
Figure 4: Test Labs page – Edit a test lab
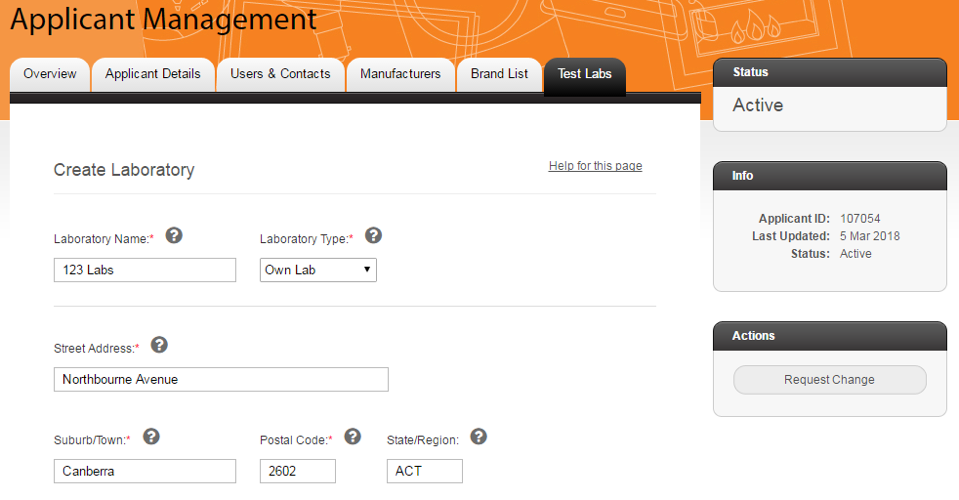
- Select the “Save” button at the bottom of the page. Your changes are now saved.
Delete a test lab
To delete a test lab:
- On the “Test Labs” page, select either “Delete” or “Remove” next
to the test lab you want to delete. See Figure 5 below.
Note: you can only delete your own test labs from the system. By selecting “Remove” for a shared lab, you are only removing that shared lab from your list of test labs.
After you select “Delete” or “Remove”, you will see one of two pages.
Figure 5: Test Labs page – Delete a test lab

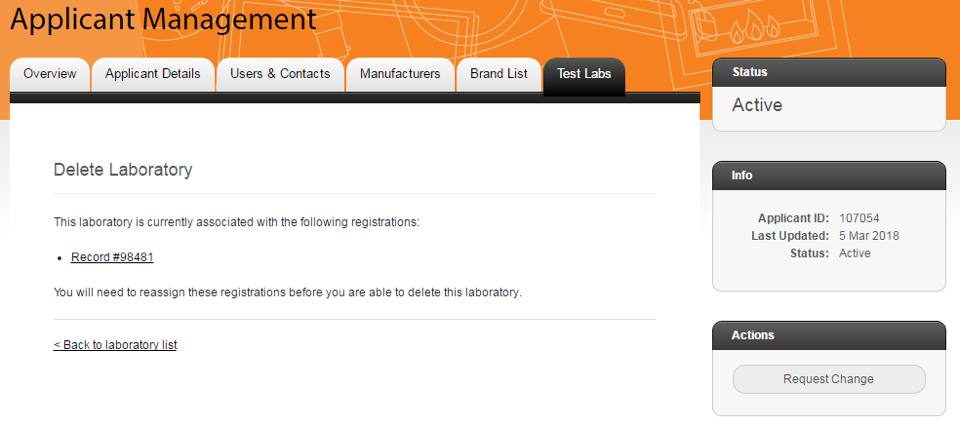
- If the test lab is still associated with any of your registrations, the page as shown in Figure 6 will appear, with details of the registrations it is linked to. You will need to assign these registrations to a different test laboratory before you can delete or remove the test lab from your list.
Figure 6: Test Labs page – Delete a test lab – Linked registrations
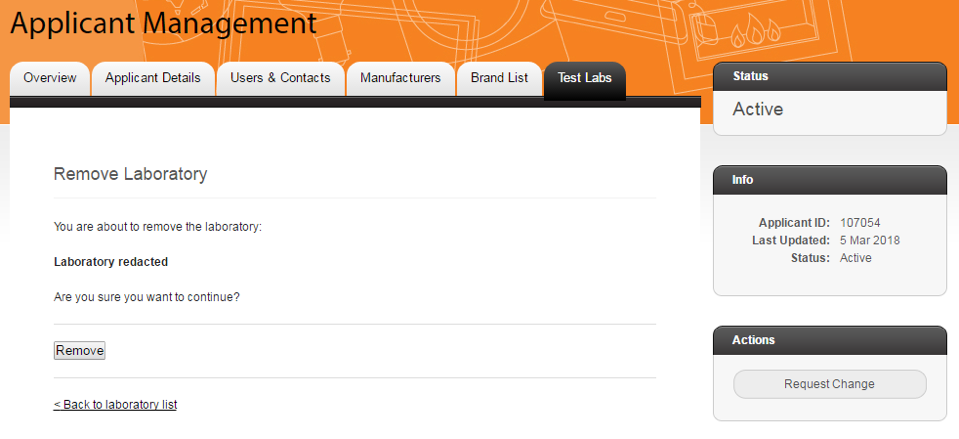
- If the test lab is not associated with any of your
registrations, you are asked to confirm if you want to continue
with deleting or removing the test lab. See Figure 7 below.
Select either the “Delete” or “Remove” button (depending on the type of lab) to remove the lab.
Figure 7: Test Labs page – Delete a test lab – Confirmation