E3 - Equipment Energy Efficiency
Help Section - Troubleshooting
Last updated 30 May 2019
Uploading Files
The following page will show you how to upload files in the registration system. Watch our walkthrough video below:
Alternatively, you can follow the detailed instructions outlined below:
Some steps in the application require you to upload a document or documents. Such documents can include:
- Test reports
- Nameplate images
- Energy rating label
- Letters of authorisation
- Product images.
Rules for uploading documents
- You cannot upload more than one file at a time.
- If you upload very large files the browser may appear to “freeze” as it is uploading the document. It may be useful to break large files up into smaller sections.
- Ensure that the name of the file you are uploading does not contain any special or foreign characters (such as © á ë). Only use standard characters, for example, A-Z, 0-9, dash, underscore and space.
About uploading a file
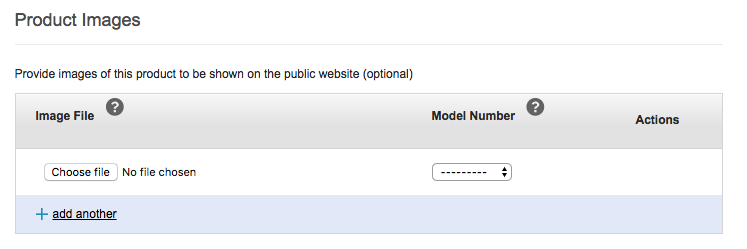
When a document needs to be uploaded, the following question will be displayed (the screen below is for uploading a product image on the Public Website step).
Figure 1: Product Images page
Depending upon which browser you are using, the method to upload a file may look different. The following figures show what the upload file most often looks like.
Figure 2: Browse

Figure 3: Choose file

Figure 4: Browse

To upload a document or file:
- Select the “Choose File” or “Browse” button.
- Browse to the location of the document you want to upload.
- Select the “file” you want to upload.
- Note that you can only upload one file at a time. Large files will take a long time to upload. Ensure the name of the file contains only standard characters such as A-Z, 0-9, underscore and space.
- Select the “Open” button.
- Your file will be uploaded to your application. Note that if your file is very large or you are on a slow internet connection it may take several minutes for your file to upload.
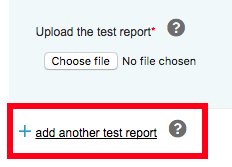
- If you need to upload another file select “add another” (see Figure 5 below) and repeat steps 1 – 4.
Figure 5: Add another test report