E3 - Equipment Energy Efficiency
Help Section - Applicant Management
Last updated 10 October 2018
Manage Your Applicant's Authorised Representatives
The following page will show you how to manage your Applicant’s Authorised Representatives in the registration system.
This includes how to add, edit or remove an Authorised Representative from your applicant, and how to view registrations they have created.
You can have more than one Authorised Representative for an Applicant. This allows the Authorising Officer to easily manage the people in their organisation and ensure they have the appropriate access. The Authorised Representatives assist the Authorising Officer in managing the Applicant's registrations.
Watch our video walkthrough to see how to manage your Authorised
Representatives:
Alternatively, you can follow the detailed instructions outlined below:
Add an Authorised Representative
To add another Authorised Representative to your Applicant:
- From the Dashboard menu, select the "Applicant Management" tab.
- From the Applicant Management menu, select the “Users & Contacts” tab. The User Accounts page will display as shown in Figure 1 below.
Figure 1: Users Accounts page
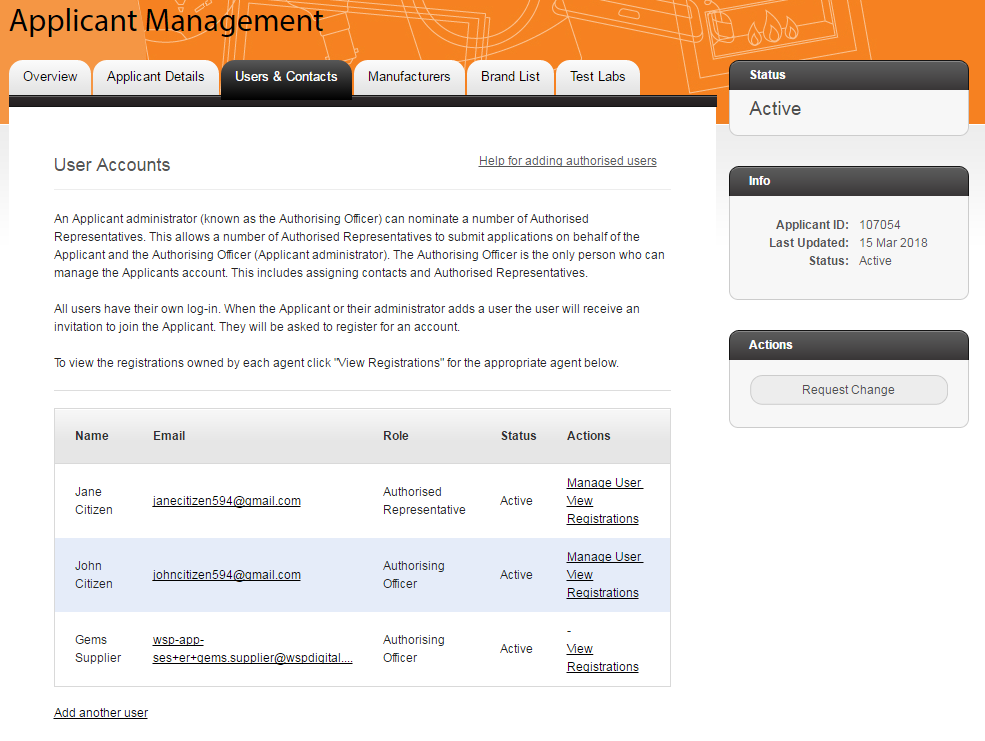
- Under the User Accounts section, select the “Add another user” link. The Invite User to Join Applicant page displays. See Figure 2 below.
Figure 2: Invite User to join Applicant page
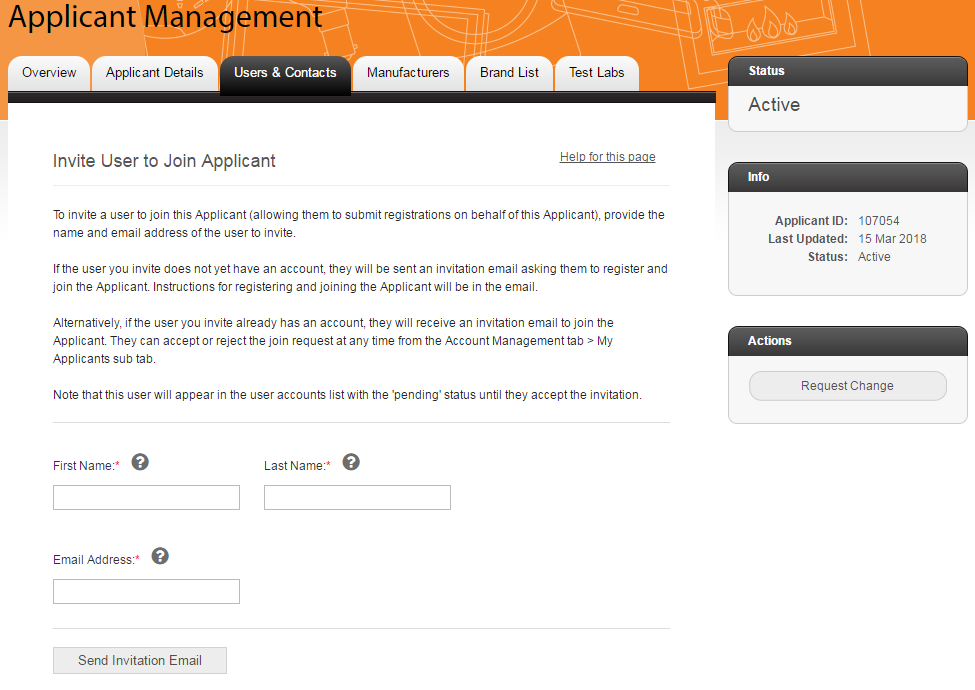
- In the “First Name” field, enter the user’s first name.
- In the “Last Name” field, enter the user’s last name.
- In the “Email Address” field, enter the user’s email address.
- Select the “Send Invitation Email” button. The user will be emailed instructions on accepting the invitation and joining the account. When the user registration is completed, this user will be added to the account.
Edit or Remove an Authorised Representative
To edit or remove an Authorised Representative from your Applicant:
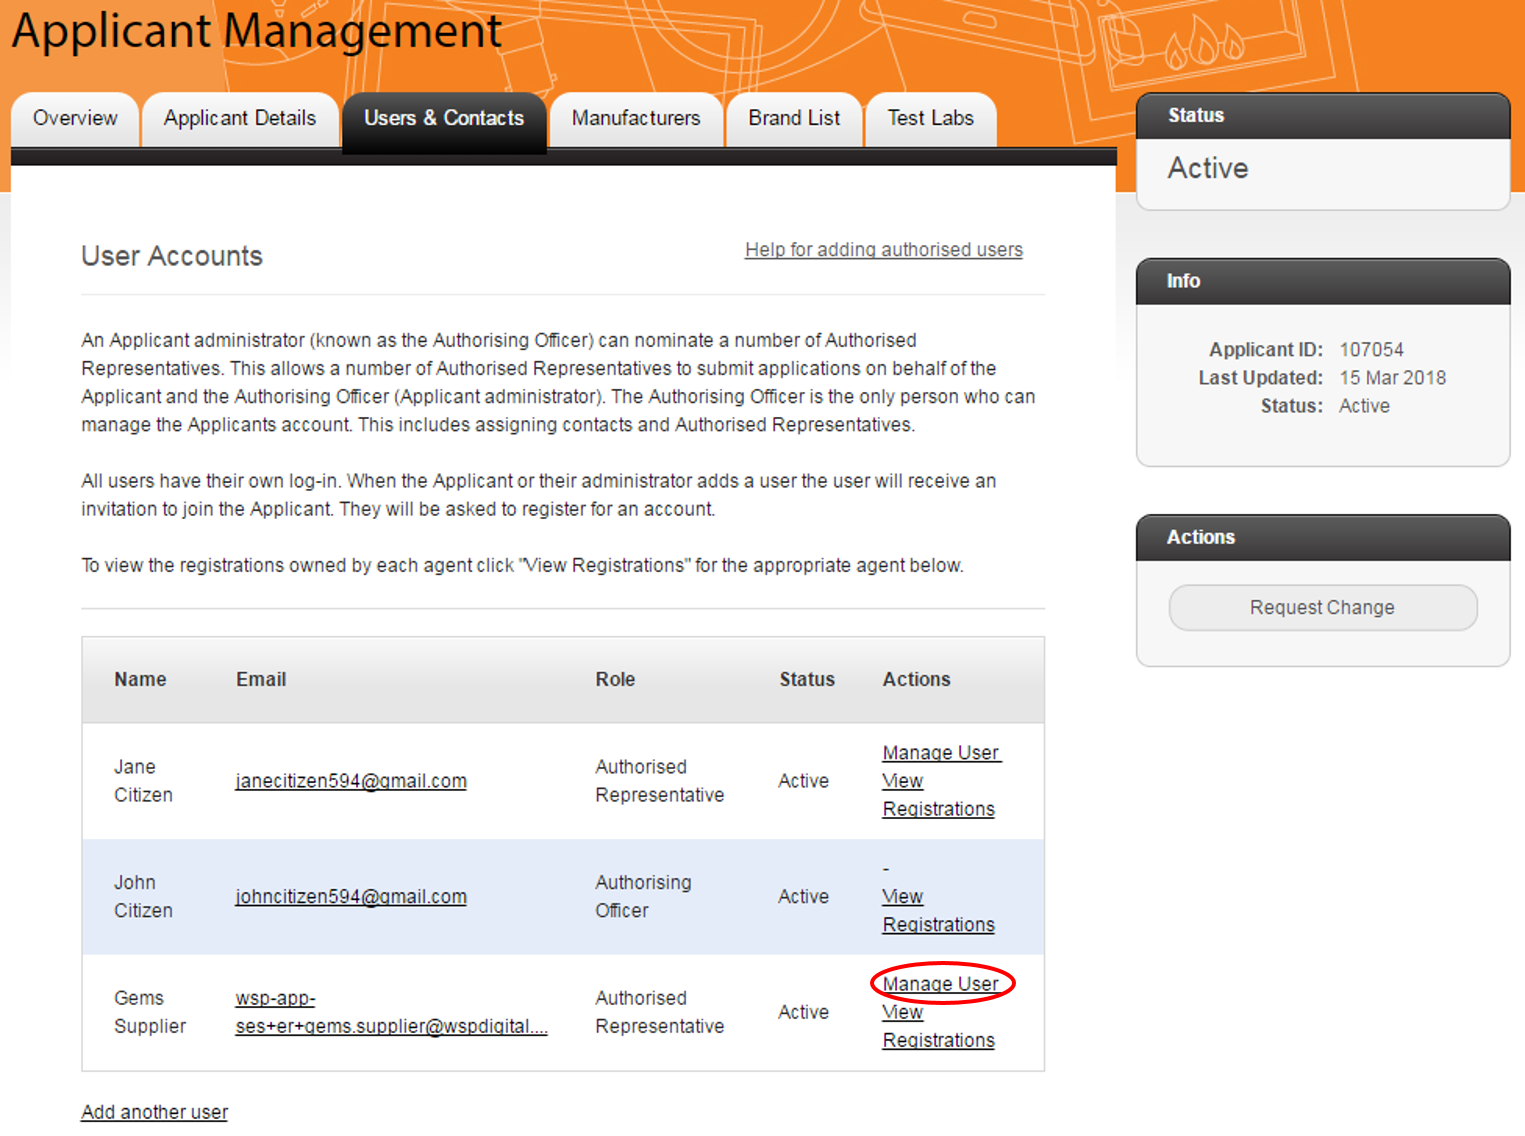
- On the Users & Contacts page, select “Manage User” next to the Authorised Representative you want to edit or remove. See Figure 3 below.
Figure 3: Users & Contacts page – Manage User link
-
On the “Manage Membership” page, make any edits you want to
make.
To remove the user from the Applicant, tick the checkbox next to “Remove this user”. See Figure 4 below.
Figure 4: Users & Contacts page – Manage User
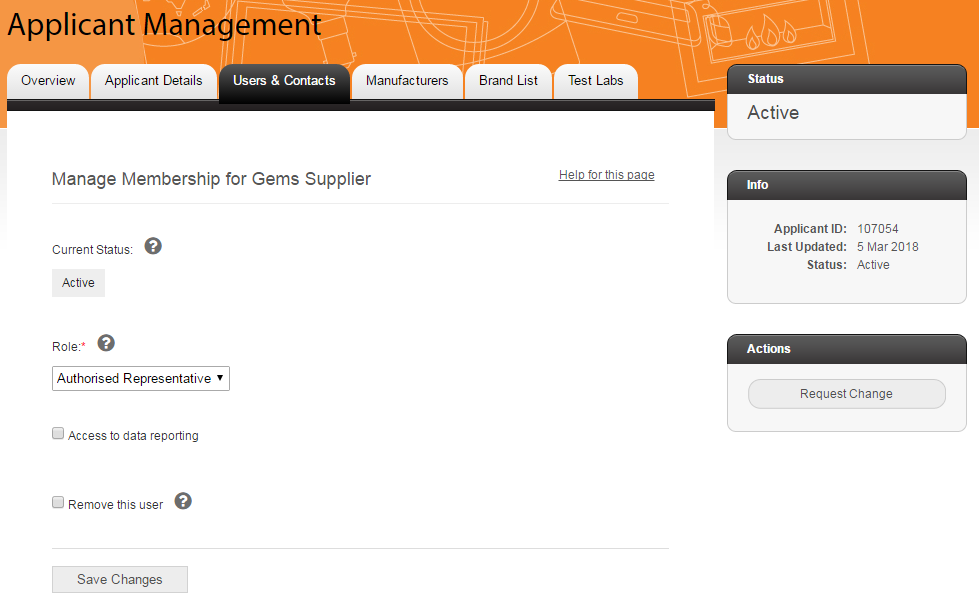
- Select the “Save Changes” button. Your changes to this Authorised Representative are now saved. If you chose to remove the user, they will no longer appear in your list of User Accounts.
View an Authorised Representative’s registrations
To view registrations that an Authorised Representative has submitted on behalf of the Applicant:
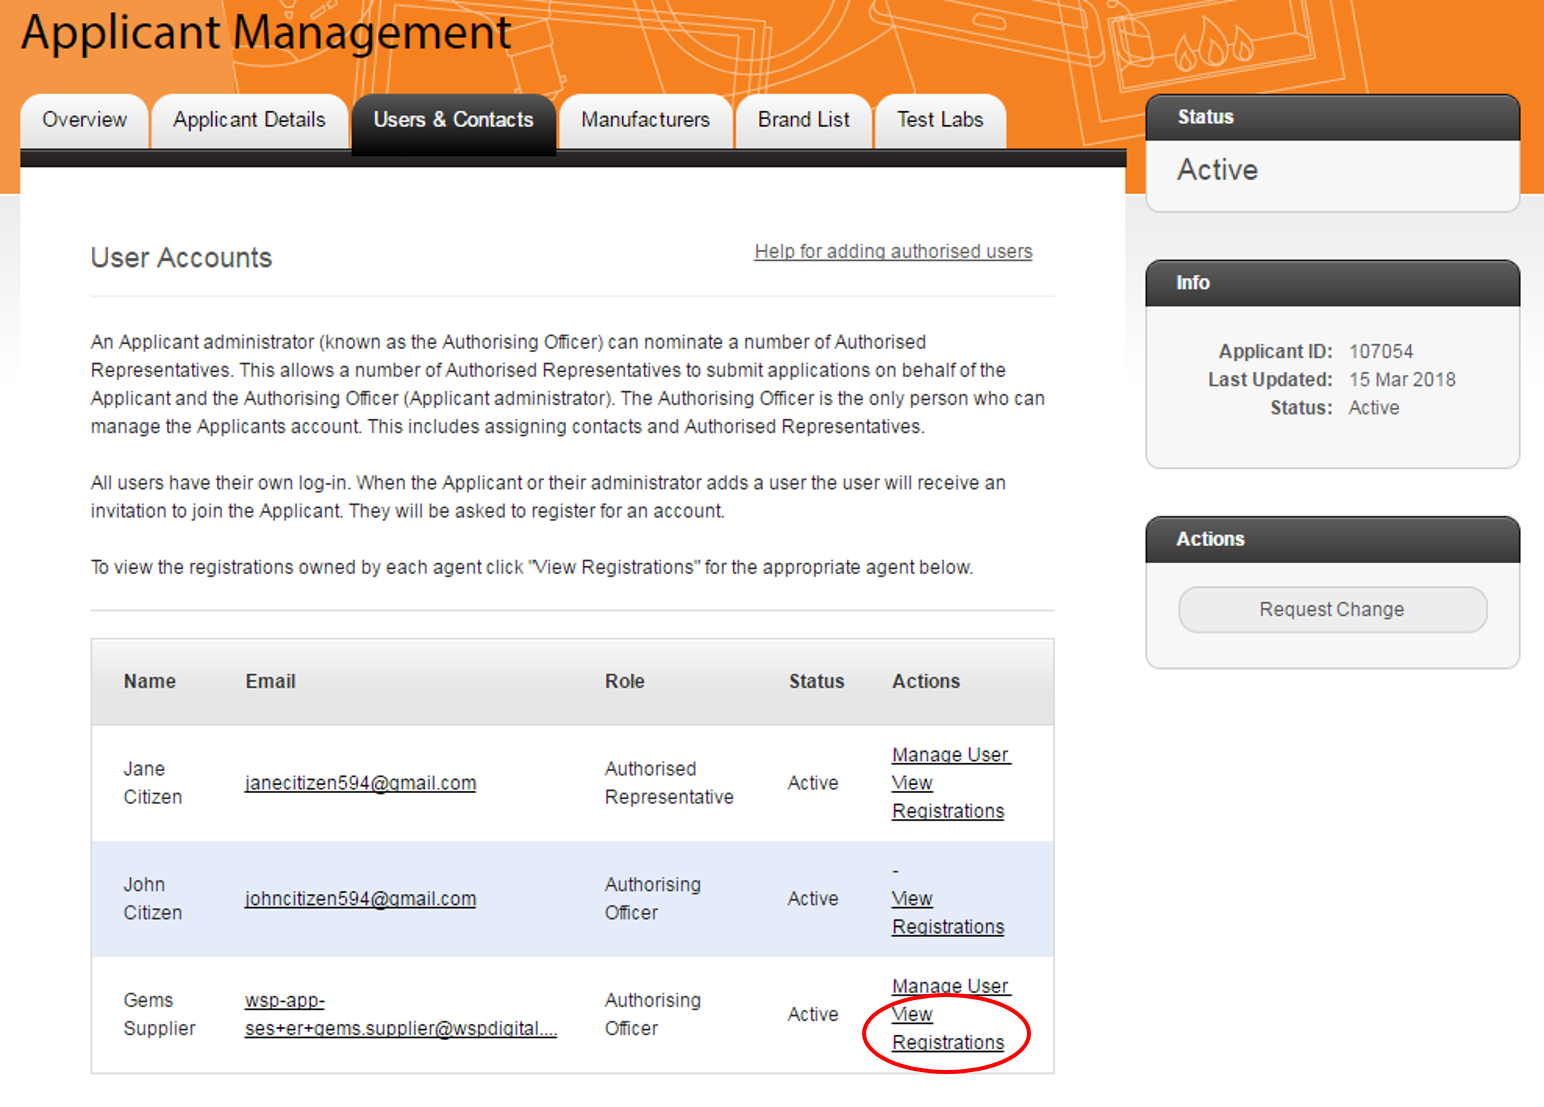
- On the Users & Contacts page, select “View Registrations” next to the Authorised Representative whose registrations you want to view. See Figure 5 below.
Figure 5: Users & Contacts page – View Registrations link
-
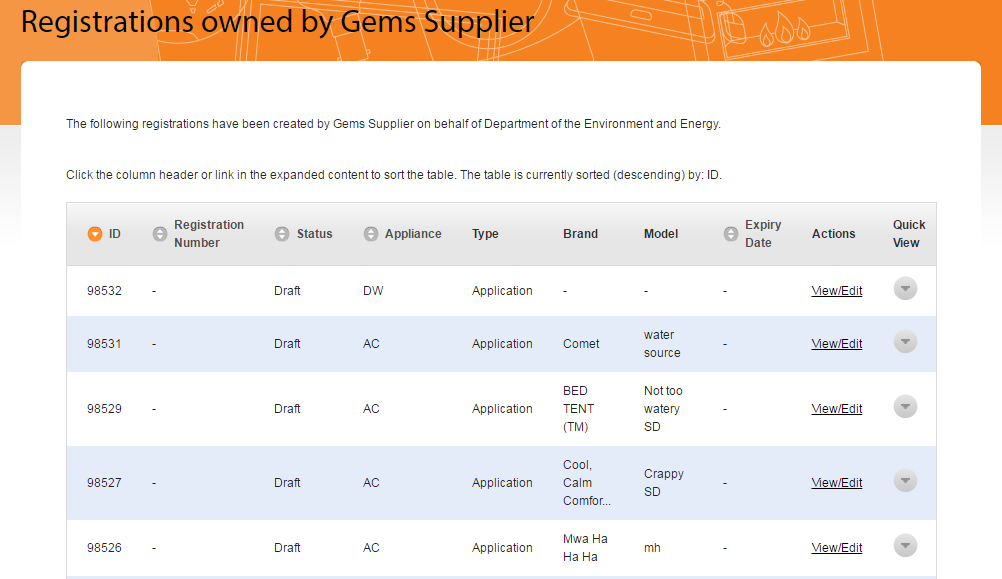
The page as shown in Figure 6 below appears. This page lists all
of applications/registrations that this Authorised
Representative has worked on or submitted on behalf of the
Applicant.
Select “View/Edit” next to a registration to view the details of that application.
Figure 6: Registrations owned by the Authorised Representative