E3 - Equipment Energy Efficiency
Help Section - Applicant Management
Last updated 10 October 2018
Manage Your Applicant's Contacts
The following page will show you how to manage your Applicant’s Contacts in the registration system.
This includes how to add, edit or delete a contact.
Important Information
Each Applicant can have a number of Authorising Officers, Authorised Representatives and Contacts. For further information on these roles, please click here.
- Individuals listed as a Contact are only able to submit applications to register products if they are also an Authorising Officer or Authorised Representative of the Applicant ID.
- When the roles and responsibilities of an account need to be changed, this can be done by an Authorising Officer of the Applicant ID. You do not need to contact the Energy Rating Team to make these changes. When an Authorising Officer leaves the Applicant organisation, this role must be changed to another person. For instructions on changing the Authorising Officer to another person, click here. .
- Any new Authorising Officer must have their own log in and profile to access the Registration System; sharing user names and passwords is not permitted. False and misleading information is an offence under the GEMS Act. This includes submitting information under someone else’s profile.
Watch our video walkthrough below to see the process of managing your applicants.
Alternatively, you can follow the detailed instructions outlined below:
Add a contact
You must have at least one Contact in your Applicant ID account before you can submit applications to register products. In the application form you will need to list:
- an Administrative contact,
- a Technical contact, and
- An Accounts Payable contact.
These can all be the same person, but if you have different people conducting these tasks then you will need to add them here. In the application you will also be asked if there is an alternative contact for these three types. If you wish to add alternative Administrative, Technical and Accounts Payable contacts you can add them here.
To add a contact to your Applicant ID account:
- From the top menu, select the "Applicant Management" tab. The Applicant Management page displays:
Figure 1: Applicant Management
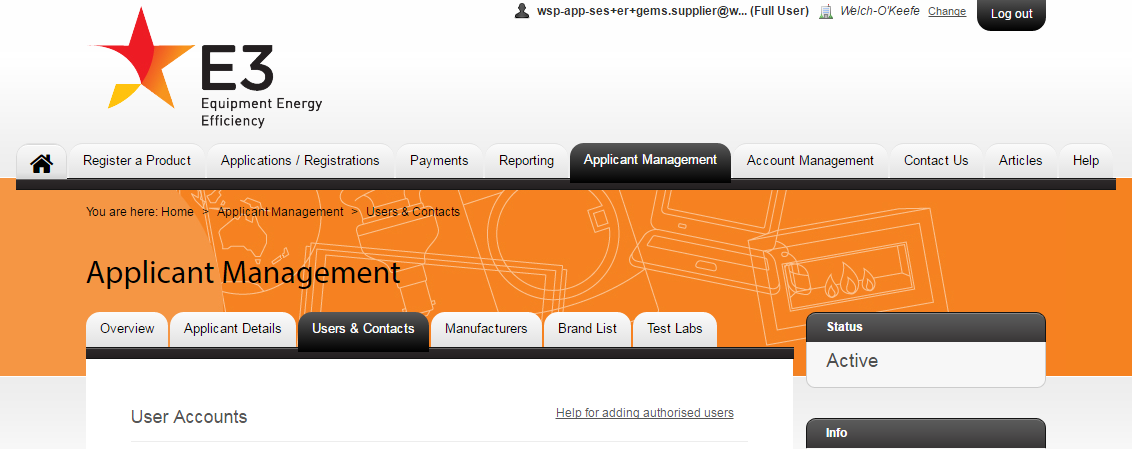
- Select the “Users & Contacts” tab. The Users & Contacts page displays. See Figure 2 below.
Figure 2: User Accounts & Contacts page
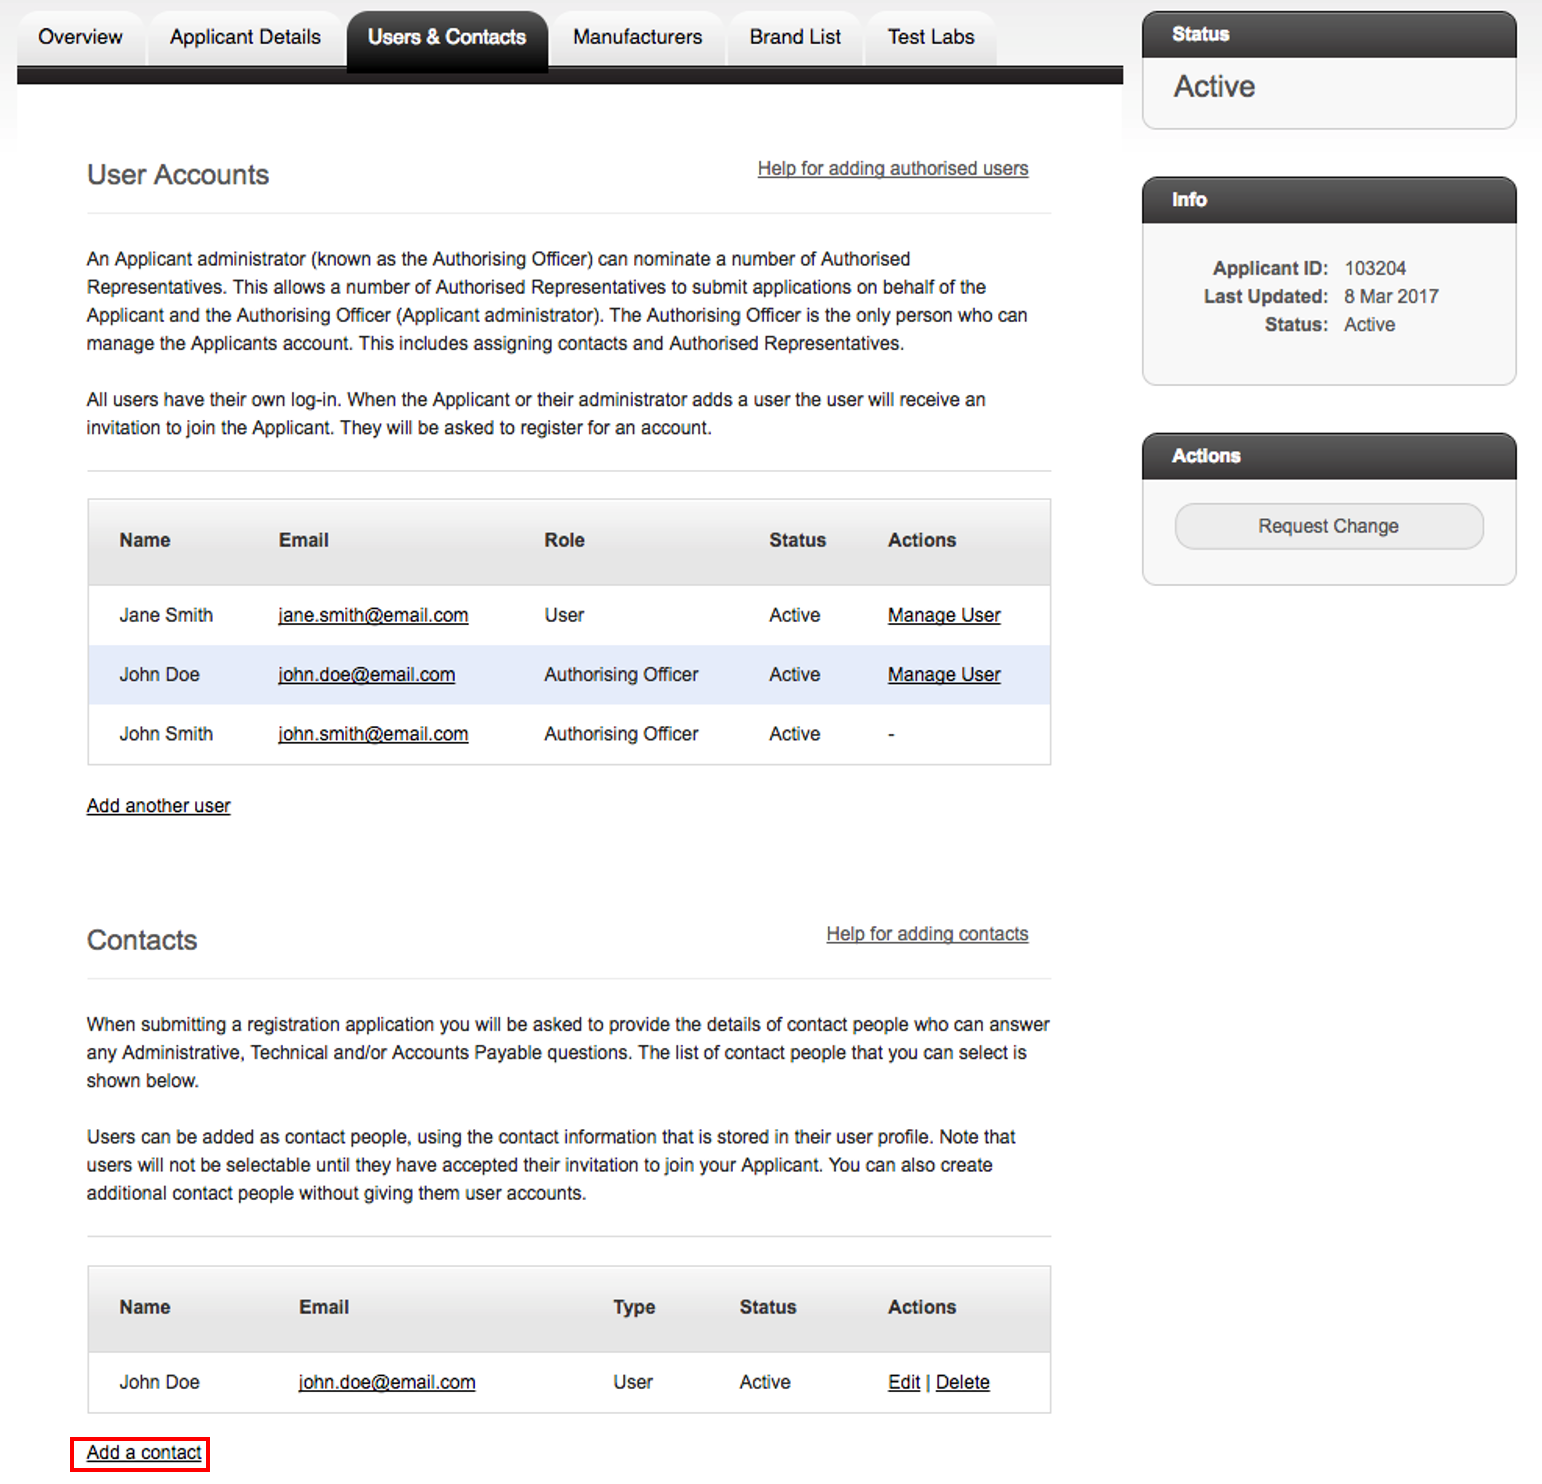
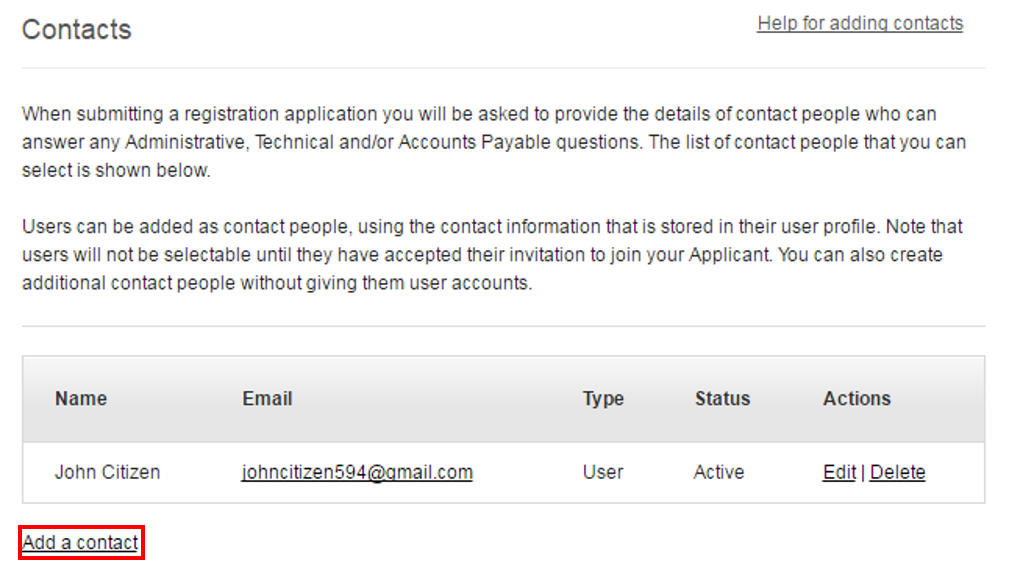
-
Select “Add a contact” link. The Create Contact page
displays. See Figure 3 below.
Please note that you can have more than one Authorised Representative for an Applicant ID account. The Authorised Representative can also be the nominated contact.
Figure 3: Applicant Management create contact page
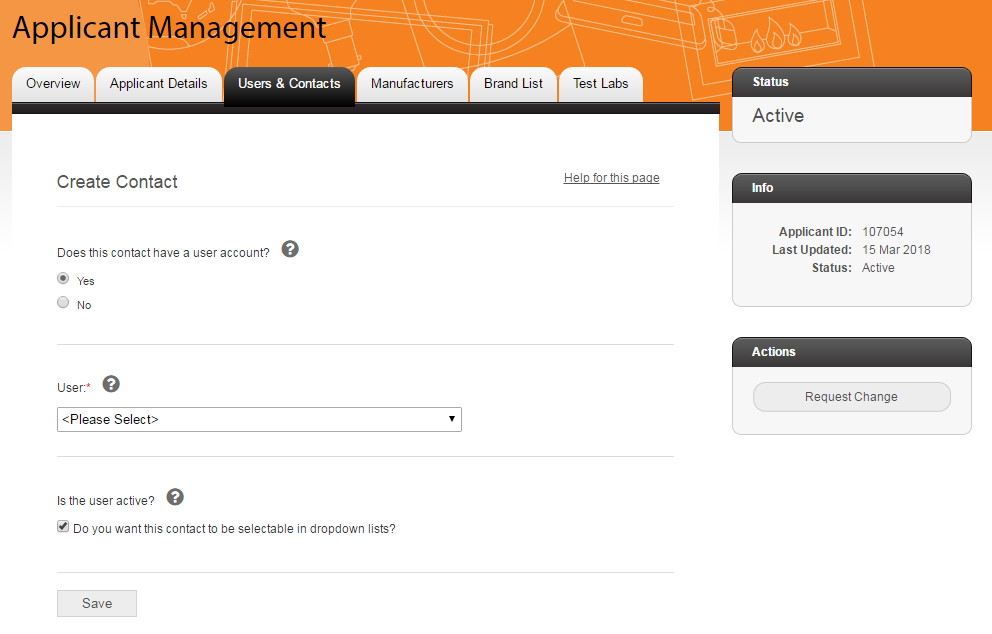
- From the “Does this contact have a user account?” select either yes or no.
-
If you selected “Yes” then complete the following. If you
selected “No”, go to step 6.
- From the “User” drop-down list, select a user.
- Select the “Save” button.
- The contact is added as a user.
-
If you selected “No” then complete the following:
- In the “Full Name” field, enter the full name of the new contact.
- In the “Organisation” field, enter the organisation of the new contact.
- In the “Job Title” field, enter the job title.
- In the “Email Address” field, enter the email address.
- In the “Phone” field, enter the phone number (including the area and country codes).
- In the “Fax” field, enter the fax number (including the area and country codes).
- In the “Street Address” field, enter the street number and name.
- In the “Suburb / Town” field, enter the suburb within a city or town, whichever is applicable.
- In the “Postal Code” field, enter the postal code.
- In the “State / Region” field, enter the state, county or region, whichever is applicable.
- From the “Country” drop-down list, select the country.
- elect the “checkbox” if the postal address is the same as the street address. If the postal address is different, complete the address fields.
- If you do not want this contact to be a visible contact when completing your applications then make sure the checkbox is not selected.
- Select the “Save” button. The contact is added.
Edit a contact
To edit a contact:
- On the “Users & Contacts” page, in the Contacts section, select the “Edit” link next to the contact you want to edit. See Figure 4 below.
Figure 4: Edit a contact
- On the “Edit Contact” page, make the changes you require. See Figure 5 below.
Figure 5: Edit a contact page

- When you’ve finished editing the contact, select the “Save” button at the bottom of the page. Your changes are now saved.
Delete a contact
To delete a contact:
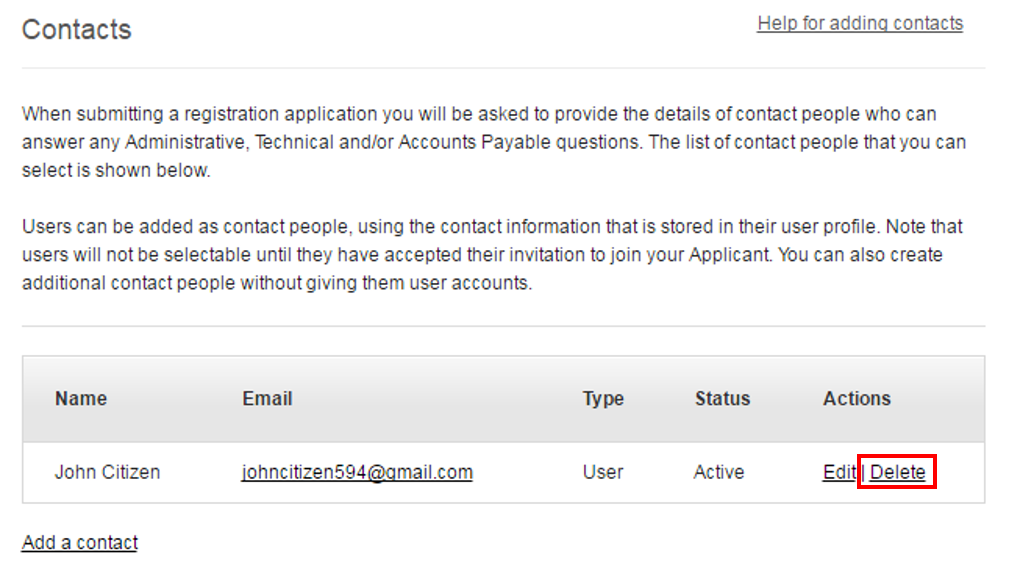
- On the “Users & Contacts” page, in the Contacts section, select the “Delete” link next to the contact you want to edit. See Figure 6 below.
Figure 6: Delete a contact
-
You will then see one of two pages.
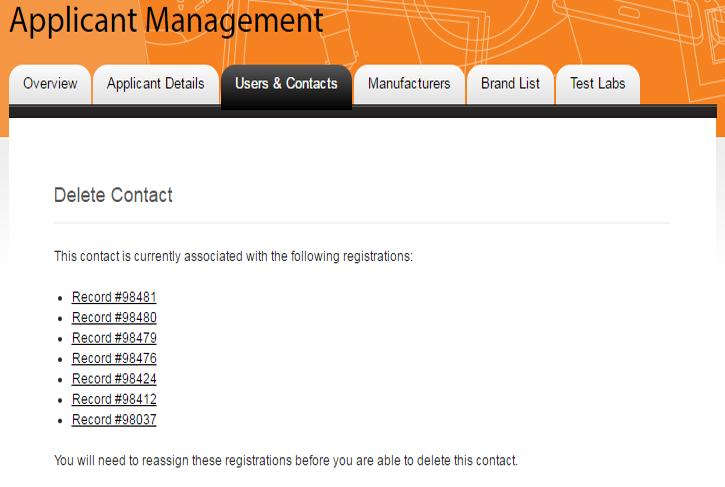
If our contact is still associated with registrations, a list of those registrations will appear, and you will need to reassign those registrations to a different contact person before you can delete this contact. See Figure 7 below.
If this does not apply to you, skip to Step 3.
Figure 7: Delete a Contact – Registrations linked to contact
-
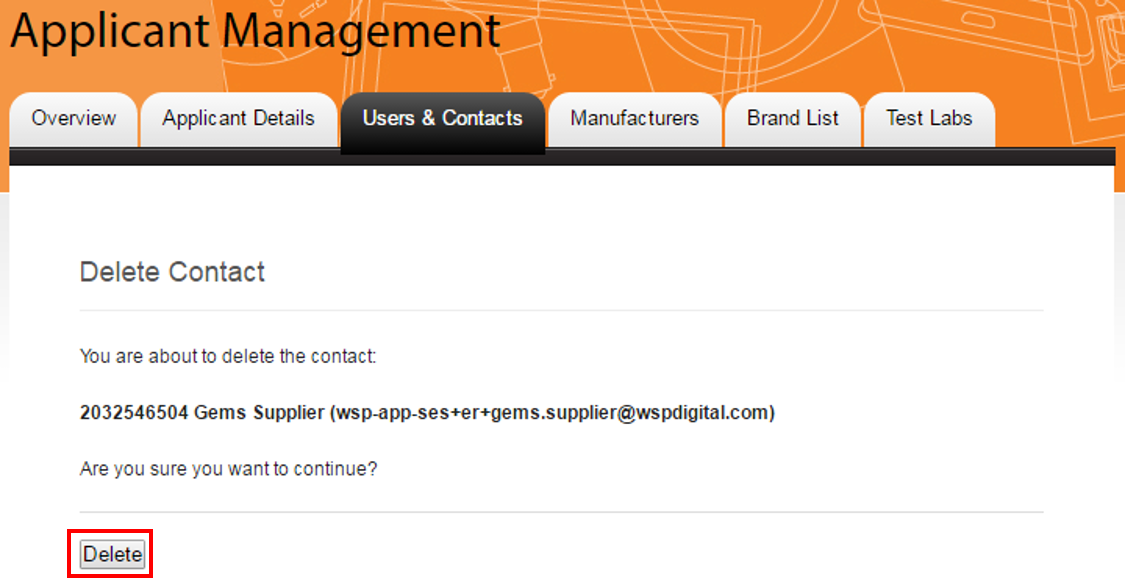
If your contact is not associated with any registrations, you’ll
see a message asking you to confirm that you would like to
delete this contact. See Figure 8 below.
Select the “Delete” button to confirm and delete the contact. Your contact is now deleted.
Figure 8: Delete a Contact – confirm deletion of contact