E3 - Equipment Energy Efficiency
Help Section - Submitting an Application for Registration
Last updated 10 October 2018
Bulk Application For Registration
This page shows you how to complete a bulk application for registration.
You can use the Bulk application process when you have a number of the same products that need to be registered. You can upload an excel spreadsheet of your application information or you can create individual applications for each product. The bulk application can only be used for products where you would answer the same questions, but the responses may be different. Each bulk application can have up to 100 applications.
This section will show you how to make a bulk application, and guide you through the screens that are common to all bulk applications for registration. Parts of creating a bulk application are similar to creating a normal product application.
Watch our video walkthrough to see how to create a bulk application:
1. Create a bulk application for registration
To begin a bulk application:
- From the Dashboard page, select on the “Register a Product” tab. The Registration Type page will display.
Figure 1: Registration Type page
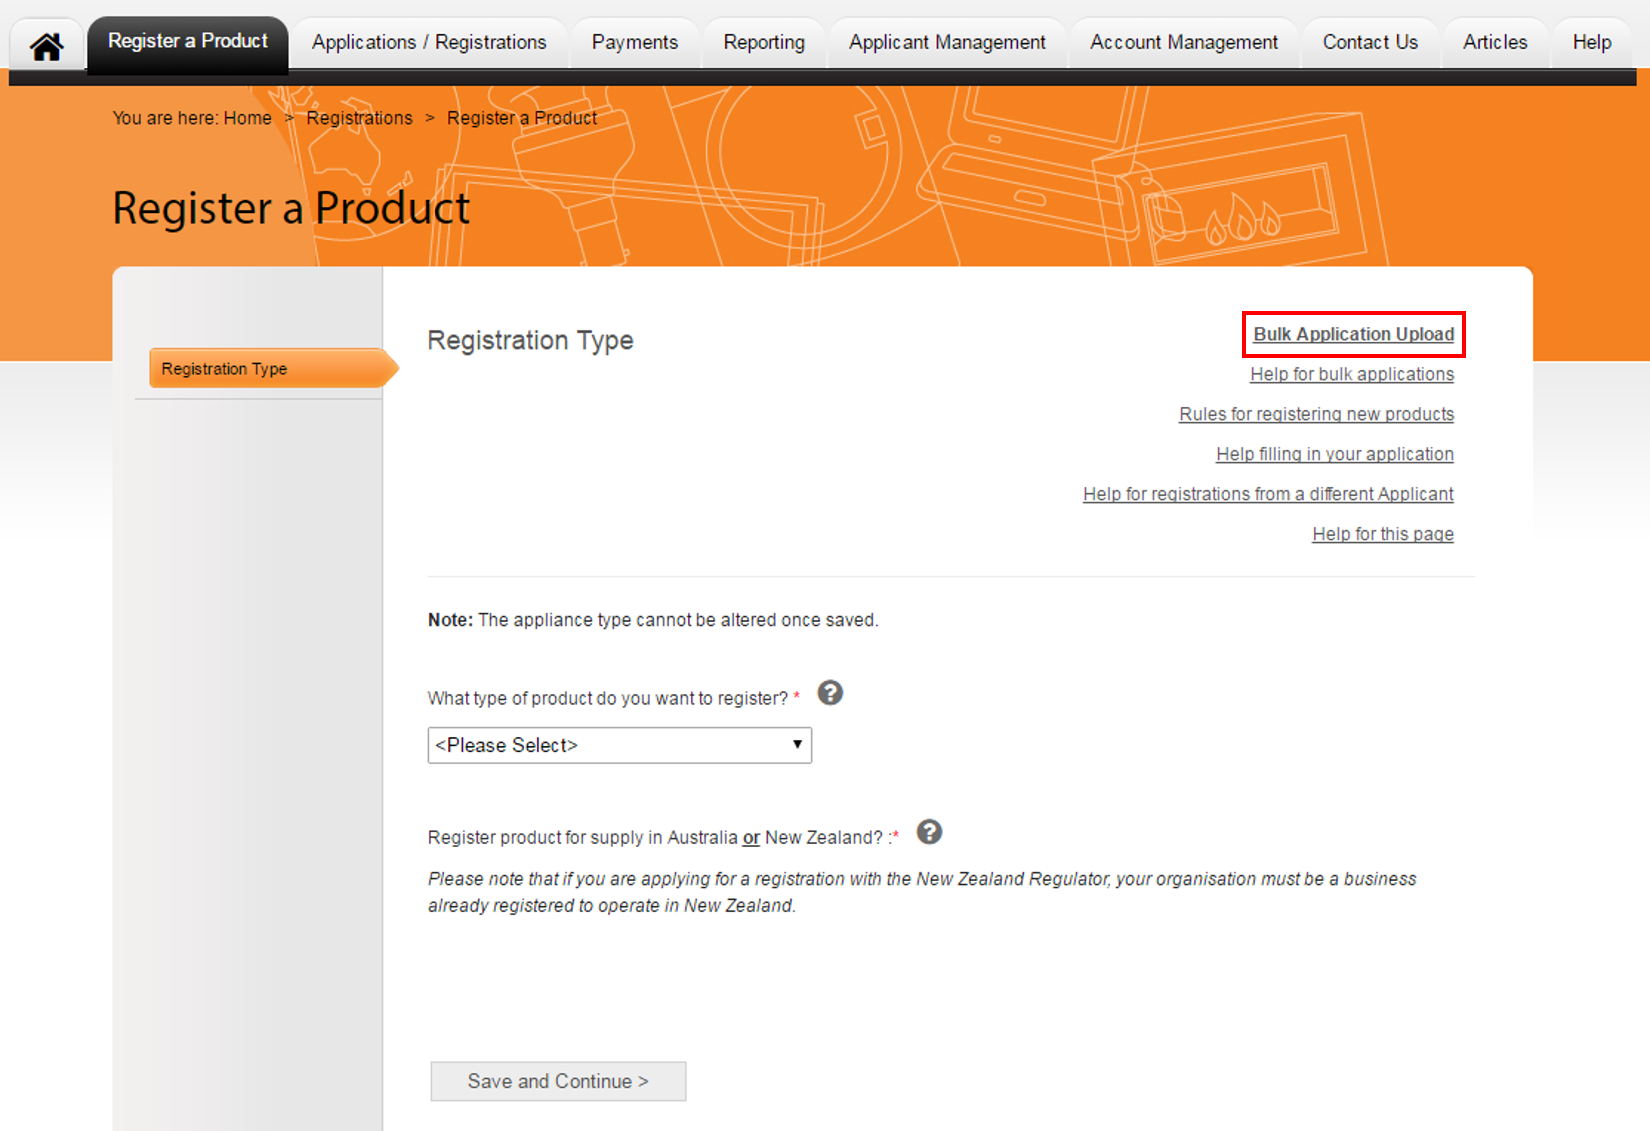
- From the Registration Type page, select on the “Bulk Application Upload” link in the top right hand corner (see red box in Figure 1 above).
- Fill in details as required and follow the prompts that appear.
2. Data Upload Screen - Generate an XLSX (Excel) Template
Once you have completed the preceding steps of the bulk application for registrations, you can generate an Excel template to enter your registration data into.
To generate an Excel template:
Figure 2: Generate an Excel Template page
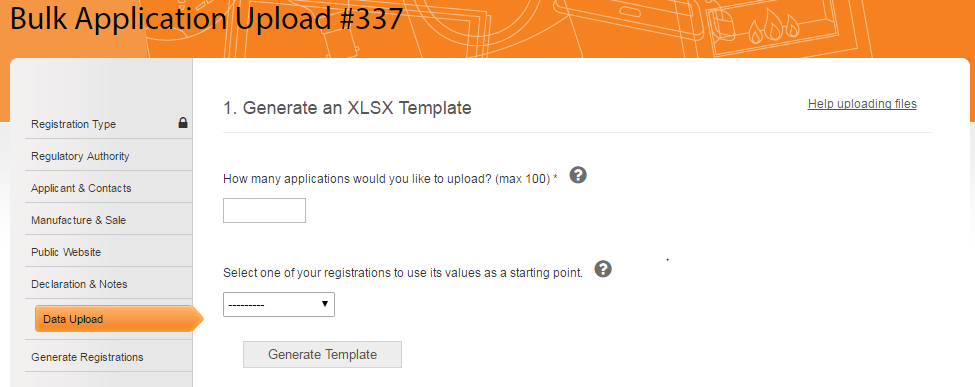
- Under the question “How many applications would you like to upload?”, enter the number of applications you are going to enter into the Excel template and upload into the system. You are limited to a maximum of 100 applications.
- An application may be for a single model or, if it is for a family of models, it can contain multiple models. You need to enter the number of actual applications you need to upload, not the number of models you are applying to register.
- At the field “Select one of your registrations to use as a starting point”, select one of your existing registrations. This is useful if you would like the rows in the Excel template to be pre-filled with data from this registration. In order for an existing registration to appear in the drop down box, it must be the same application type, regulatory standard and application variants.
- Select the “Generate Template” button. An Excel template is created for you to enter your registration data into.
TIP: When filling out the template, use a single row for each registration application. The column headers and prefilled text will guide you through entering the data for each registration application into the correct spot. Do not change the structure of the spreadsheet, and only enter data into the correct spots, otherwise when you upload it into the system, it will be rejected. Some columns will have validation rules, which mean that you can only enter certain types of data into the cells, such as numbers or text.
3. Upload Data
To upload your completed template:
Figure 3: Upload Data page
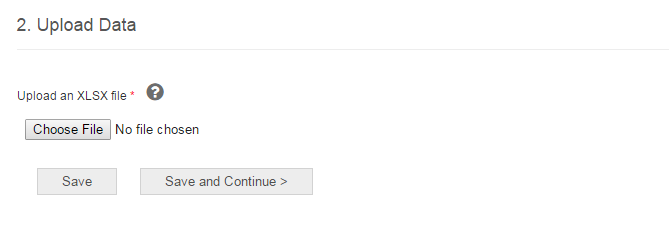
- Under the field “Upload an XLSX file”, select on the “Browse” button. Browse to the location of your completed template, select it and select “Open”.
- Select “Save and Continue”.
4. Generate registrations
Once you have uploaded your Excel file of applications into the system, you can complete the bulk application process by creating the applications in the system.
To generate the applications in the system:
Figure 4: Generate registrations page
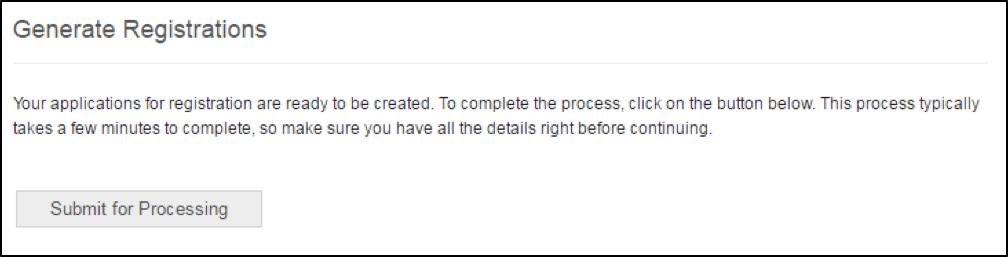
- At the step labelled “Generate Registrations’, select the “Submit for Processing” button, as shown in Figure 4 above. This process can take a few minutes to complete.
- Once this process is complete, these applications will appear in the “Application / Registrations” tab.
- Each application will need to be reviewed individually and extra information added as required.
- Each application will then also need to be submitted individually according to the instructions for the Summary and Submit Registration help page.
- For help on paying for your applications, go to the Payment help page.
